

Table of Contents
- Step 1: Ensure Your Safety First
- Step 2: Stop the Water Source and Document the Damage
- Step 3: Sewage Cleanup Safety Precautions to Follow
- Step 4: How to Sanitize After Sewage Spill
- Step 5: What Can Be Saved? Salvageability by Material
- Step 6: Navigating Sewage Backup Insurance Coverage
- Step 7: When to Call a Professional for Sewage Backup Cleanup
- Preventing Future Sewage Backups
- Frequently Asked Questions
Last Updated: September 9, 2026
A sewage backup is one of the most hazardous home emergencies you can face. Unlike clean water leaks, sewage contains pathogens, bacteria, and viruses that pose serious health risks. Knowing the steps to take after sewage backup can mean the difference between a manageable cleanup and a prolonged health hazard.
Step 1: Ensure Your Safety First
Treat sewage backup as a biohazard situation. The Centers for Disease Control and Prevention guidance on sewage exposure emphasizes that raw sewage contains disease-causing organisms that can enter the body through skin contact, inhalation, or ingestion.
Take these immediate safety measures:
- Evacuate children, elderly family members, and anyone with respiratory conditions or weakened immune systems
- Turn off electricity to affected areas at the breaker panel if water is near outlets or appliances
- Shut off the main water supply if the backup involves your plumbing system
- Keep pets away from contaminated areas
- Avoid running fans that could spread airborne contaminants throughout your home
Never enter a flooded basement or room where water may have reached electrical outlets or appliances. Electrocution risk is real and potentially fatal. Wait for professional assessment if you have any doubt about electrical safety.
Step 2: Stop the Water Source and Document the Damage
Once everyone is safe, stop the flow of sewage and document the damage.
If the backup comes from your main sewer line, stop using all plumbing fixtures immediately. If you have a septic system, avoid pumping or draining until a professional assesses the situation.
Next, document everything. Take photos and video of the affected areas, the source of the backup, and any damaged belongings before cleanup begins. FEMA guidance on documenting property damage for claims recommends thorough visual documentation before moving or discarding anything. This evidence is essential for your sewage backup insurance coverage claim.
Step 3: Sewage Cleanup Safety Precautions to Follow
Wear these items throughout the cleanup process:
- Rubber boots and waterproof gloves
- Safety goggles or face shield
- N95 respirator or mask rated for particles
- Disposable coveralls or clothing you can discard afterward
- Protective outerwear that covers all skin
Establish a clean zone outside the affected area where you remove and discard protective gear. Do not walk contaminated shoes or equipment through uncontaminated parts of your home.
The Occupational Safety and Health Administration guidelines on hazard recognition classify raw sewage as a potential source of infectious disease, reinforcing why professional-grade protection matters during cleanup.
Step 4: How to Sanitize After Sewage Spill
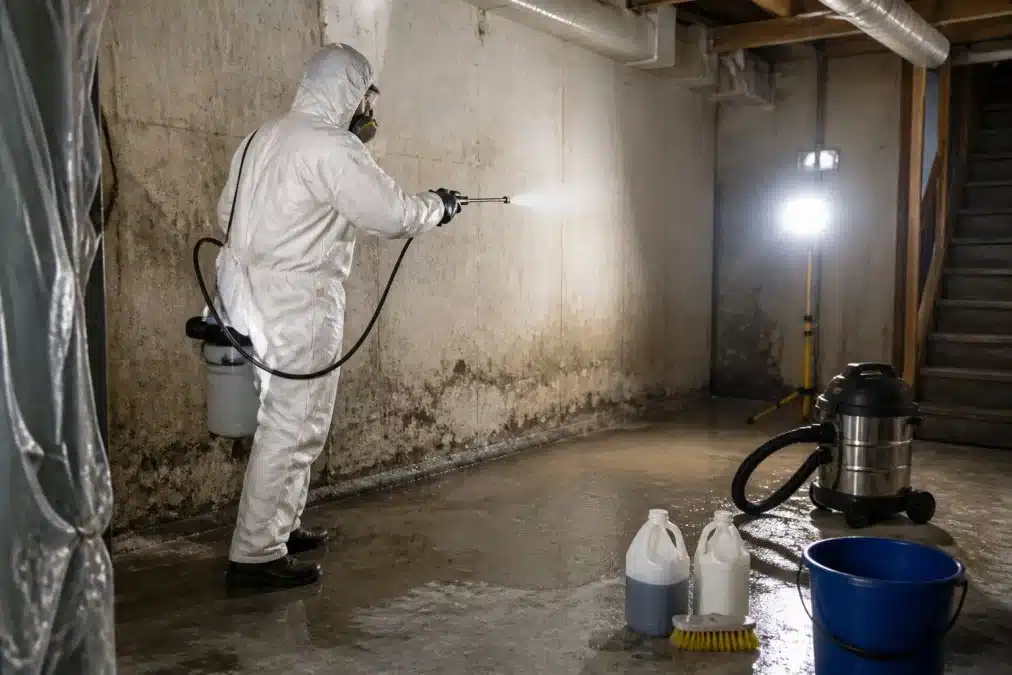
Sanitization is the most critical phase of sewage backup cleanup. Simply removing the water is not enough, you must kill the pathogens left behind on every contaminated surface.
Remove standing water with a wet vac or submersible pump, disposing of it properly, never into your home’s drainage system if the backup originated there.
For sanitization, the Environmental Protection Agency guidance on disinfectants for emerging viral pathogens recommends using EPA-registered disinfectants. A bleach solution is a common and effective option for non-porous surfaces like tile, concrete, and metal. Mix one cup of bleach per gallon of water for general disinfection, but never mix bleach with ammonia or other cleaners, as toxic fumes can result.
Apply disinfectant generously and let it sit for at least 10 minutes before wiping. Pay special attention to:
- Baseboards and lower wall sections
- Floors and grout lines
- Plumbing fixtures and drains
- Any items that came into contact with sewage water
Take photos of contaminated areas and items before you begin cleaning. Insurance adjusters need visual evidence of the sewage backup extent, and thorough documentation can significantly speed up your sewage backup insurance coverage claim.
Step 5: What Can Be Saved? Salvageability by Material
Not everything touched by sewage can be saved. Understanding what is salvageable helps you prioritize cleanup efforts.
Porous materials absorb sewage and are nearly impossible to fully sanitize. These should be discarded:
- Carpet, padding, and upholstered furniture
- Drywall that was submerged or saturated
- Mattresses, pillows, and bedding
- Cardboard, paper products, and books
- Insulation materials
Non-porous surfaces can typically be cleaned and disinfected:
- Ceramic tile and grout (after thorough scrubbing)
- Concrete and sealed wood floors
- Metal fixtures and appliances (after professional inspection)
- Glass, plastic, and hard rubber items
Discard any food that may have touched sewage, including items in opened containers. Baby bottles, pacifiers, and toothbrushes should be thrown out regardless of visible contamination.
When in doubt, discard the item, replacement costs far less than medical expenses from a sewage-related illness.
| Material Type | Salvageable? | Action Required |
|---|---|---|
| Carpet and padding | No | Discard completely |
| Drywall (saturated) | No | Cut out and replace |
| Ceramic tile | Yes | Scrub and disinfect |
| Concrete floors | Yes | Clean and disinfect |
| Upholstered furniture | No | Discard |
| Metal appliances | Possibly | Professional inspection |
Step 6: Navigating Sewage Backup Insurance Coverage
Most standard homeowners insurance policies explicitly exclude damage caused by sewer or drain backups, meaning you likely need a separate endorsement, often called a “Water Backup and Sump Overflow” rider, to be covered.
Step 1: Review Your Policy Declarations Page
Your declarations page summarizes your coverage. Look for these specific terms:
- Water Backup and Sump Overflow: This endorsement typically covers damage from water that backs up through sewers or drains, or overflows from a sump pump. Coverage limits are often separate from your main dwelling coverage, commonly ranging from $5,000 to $25,000, but this varies by policy.
- Sewer Backup Endorsement: Some policies list this as a distinct add-on. It may have its own sub-limits and deductibles.
- Scheduled Personal Property: If you have high-value items like electronics or artwork, check if they are scheduled separately, as standard contents coverage limits may not be sufficient.
If you cannot find these terms, call your agent immediately. Ask directly: “Is damage from a sewer line backup covered under my current policy, or do I need a separate endorsement?”
Step 2: File Your Claim Promptly
Most policies require you to notify the insurer “promptly” after a loss, often within 48 to 72 hours. When you call, have your policy number ready and be prepared to describe the source of the backup and the approximate extent of the damage. deep cleaning methods.
Step 3: Build a Claim-Ready Documentation Package
A well-organized documentation package speeds up the adjuster’s review. Assemble the following:
- Visual Evidence: Time-stamped photos and video of the affected rooms, the source of the backup, and the water level before you began any cleanup. Capture wide shots and close-ups of damaged belongings.
- A Written Timeline: Log the exact time you noticed the backup, when you shut off the water, when you called a plumber or restoration company, and when you filed the claim.
- An Itemized Inventory of Damaged Property: Create a spreadsheet listing each item, its approximate purchase date, its estimated current value, and whether it was discarded or is being held for inspection. Include model and serial numbers for appliances and electronics.
- Receipts for Emergency Expenses: Keep receipts for any supplies you purchased, such as wet vacs, disinfectants, fans, or dehumidifiers. Many policies reimburse for reasonable “emergency mitigation” expenses.
- Professional Estimates: If you hire a restoration company, obtain a detailed, line-item estimate for the cleanup and repair work. This gives the adjuster a concrete baseline for the claim.
Do not throw away damaged items until the insurance adjuster has inspected them or has given you explicit written permission to discard them. If you must discard items for health reasons (e.g., saturated carpet), take extensive photos and keep a small, sealed sample of the material for the adjuster to examine.
Step 4: Understand the Difference Between Replacement Cost and Actual Cash Value
Your policy likely pays out based on one of two methods:
- Replacement Cost Value (RCV): Pays the amount needed to replace the damaged item with a new, similar one. You may need to purchase the replacement first and submit the receipt for reimbursement.
- Actual Cash Value (ACV): Pays the replacement cost minus depreciation. An old carpet that cost $2,000 new but was 10 years old might only yield a few hundred dollars.
Knowing which method applies helps you set realistic expectations and negotiate effectively.
Step 5: Track Every Conversation
Record the date, time, representative’s name, and summary of every conversation with your insurer. If an adjuster makes a verbal promise, follow up with an email summarizing the conversation and ask for written confirmation.
Your insurance claim is a separate process from the physical cleanup, but it runs on the same principle: documentation. The more evidence you gather before, during, and after the cleanup, the stronger your position. If you are unsure about your coverage, call your agent before you spend a dollar on professional services, knowing your policy limits will guide how much you invest in mitigation versus what you can claim later.
After your claim is filed, the adjuster will likely schedule an inspection. If the assessment seems low, you have the right to provide additional evidence or request a reappraisal.
Step 7: When to Call a Professional for Sewage Backup Cleanup
Deciding between a DIY cleanup and hiring a professional is about the category of water contamination and the long-term safety of your home.
Understanding Water Damage Categories
The IICRC classifies water damage into three categories, and sewage backups almost always fall into the most severe:
- Category 1 (Clean Water): Water from a broken supply line or faucet that does not pose a health risk. This can often be handled by a homeowner with proper drying equipment.
- Category 2 (Gray Water): Water with significant contamination, such as from a washing machine overflow or a dishwasher leak. It may contain chemicals or microorganisms.
- Category 3 (Black Water): Grossly contaminated water containing pathogenic agents, including raw sewage, rising floodwater, or water from a sewer line. This category is a biohazard.
Any backup from a main sewer line is Category 3. The EPA and OSHA treat Category 3 water as a potential source of infectious disease, requiring professional-grade PPE and specific disinfection procedures beyond household bleach.
The Case for Professional Remediation
When a sewage backup is Category 3, the risk of incomplete cleanup is high. Porous materials like drywall and carpet trap pathogens deep within their structure, a visual clean does not mean a biological clean. Professional restoration companies use:
When You Should Absolutely Call a Professional
Beyond the Category 3 classification, call a professional if any of the following apply:
- The backup originated from the main sewer line or a municipal connection.
- The affected area is larger than a small, contained space (e.g., more than a single bathroom floor).
- Sewage has soaked into drywall, carpet, padding, or upholstered furniture.
- The sewage has been present for more than 24 hours, increasing the risk of mold and bacterial proliferation.
- Anyone in the household is under 5, over 65, pregnant, or has a compromised immune system or a respiratory condition like asthma.
The Post-Cleanup Verification Step Most Guides Miss
After the visible cleanup is complete, the job is not necessarily done. For Category 3 events, consider hiring an independent industrial hygienist to perform post-remediation testing.
An industrial hygienist will take air samples to test for airborne mold spores and bacterial endotoxins, swab surfaces to verify that pathogens have been eliminated, and use moisture meters to confirm structural materials are dry below the threshold where mold can grow. If testing reveals residual contamination, the hygienist will provide a written report specifying what needs to be re-cleaned.
The decision to hire a professional is not about the size of your budget, it is about the category of the water and the health of everyone who lives in the home. A Category 3 sewage backup is a biohazard event. If you have any doubt about your ability to fully sanitize the area, or if you want independent verification that your home is safe to inhabit, the cost of professional remediation and post-cleanup testing is a fraction of the cost of a mold remediation project or a hospital visit.
Professional restoration teams bring IICRC-certified technicians and commercial dehumidifiers to manage the drying process. When you call a professional, ask for their IICRC certification and their specific protocol for Category 3 water damage.
Preventing Future Sewage Backups
After the cleanup is complete, focus on preventing a recurrence. Most sewage backups result from blockages or system failures that regular maintenance can address.
Tree roots are a leading cause of main sewer line blockages. If you notice slow drains throughout your home, gurgling sounds from plumbing fixtures, or sewage odors in your yard, schedule a camera inspection of your sewer line before a full backup occurs.
Even after professional cleanup, monitor the affected area for lingering dampness, musty odors, or discoloration that could indicate hidden moisture and potential mold growth.
Dealing with a sewage backup is overwhelming, but taking the right steps after sewage backup protects your health and your home. The key is acting quickly, protecting yourself with proper safety precautions, and calling in professionals when the job exceeds your capacity. Mr. Restore combines 18 years of experience with direct insurance billing and real-time project updates through our Job-Dox system. Contact Mr. Restore online to get expert help with your sewage backup cleanup.
Frequently Asked Questions
Is it safe to stay in house after sewage backup?
No, you should leave the affected area immediately. Sewage contains pathogens like bacteria, viruses, and parasites that pose serious health risks. If the backup is large or affects the HVAC system, evacuate the entire house until a professional assesses the situation. Open windows for ventilation, but do not use fans that could spread contaminated air. Contact a restoration professional to test air quality and confirm it is safe before returning.
How long does it take for mold to grow after sewage exposure?
Mold can begin to grow within 24 to 48 hours on porous materials like drywall, carpet, and wood. The high moisture and organic content of sewage accelerate this process. This is why drying and sanitization must start immediately, not days later. If you cannot dry the area thoroughly within that window, assume mold growth is likely and have a professional remediate the area to prevent long-term health issues and structural damage.
Does homeowners insurance cover sewage backup damage?
Standard homeowners insurance policies typically do not cover sewage backup. This is usually an optional endorsement you must add to your policy, often called ‘Water Backup’ or ‘Sewer Backup’ coverage. Review your policy documents or contact your agent to confirm. If you have this coverage, document all damage with photos and keep receipts for cleaning supplies to support your claim. A restoration company can help you document the damage properly.
What should I use to clean floors after a sewer backup?
For non-porous floors like tile, concrete, or sealed hardwood, use a solution of one cup of bleach per gallon of water after removing all standing water with a wet vac. Never mix bleach with other cleaners, as it creates toxic fumes. Wear rubber gloves and eye protection. Porous floors like unsealed wood or carpet cannot be adequately cleaned and should be removed and discarded by a professional.