

Table of Contents
- Early Signs of Hidden Water Damage in Walls
- How to Find a Leak Inside a Wall: A Step-by-Step Approach
- Water Leak Detection Tools Every Homeowner Should Know
- Does Homeowners Insurance Cover Burst Pipes and Hidden Water Damage?
- How Wall Materials Change the Warning Signs
- Preventative Maintenance Checklist to Stop Water Damage in Walls
- When to Call a Professional for Water Damage in Walls
- Frequently Asked Questions
Early Signs of Hidden Water Damage in Walls
Water damage in walls rarely announces itself. According to the Insurance Information Institute’s guide to homeowners insurance claims, water damage and freezing account for a significant share of homeowner claims every year, and much of it starts behind drywall where nobody is looking. At Mr. Restore, we’ve walked into thousands of homes where the homeowner had no idea anything was wrong until a ceiling sagged or a baseboard turned black. The signs of hidden water damage in walls are quiet at first: a faint musty odor, a paint bubble that keeps coming back, a water ring that wasn’t there last month. Catching them early is the difference between a drying project and a structural repair. Here’s what to watch for:- Water stains and discoloration: Yellow-brown rings on ceilings or walls that reappear after painting
- Blistering paint or peeling wallpaper: Adhesive failure caused by dampness pushing from behind
- Musty odor: A persistent smell that doesn’t clear with ventilation points to fungal growth
- Warped drywall or a spongy texture: Soft spots where drywall saturation has compromised the material
- Flooring damage near walls: Cupping hardwood or lifting tile along a wall line
- Efflorescence: White, chalky mineral deposits left behind as moisture evaporates through the surface
How to Find a Leak Inside a Wall: A Step-by-Step Approach
Finding a leak inside a wall starts with ruling out the obvious sources before you open anything up. Most hidden leaks trace back to plumbing supply lines, drain lines, roof intrusion, or condensation, and each one behaves differently, which is why a methodical walkthrough narrows the list fast. The goal is to separate an active supply leak from an intermittent drain leak from a weather-driven intrusion before you cut anything open.- Isolate the supply side with the meter test. Shut off every fixture and appliance that uses water, sinks, showers, toilets, dishwasher, washing machine, ice maker. Then watch the water meter at the curb or in the basement. If the low-flow indicator (the small triangle or dial) is still turning, you have an active supply-line leak (the EPA). If it stops, the leak is on the drain side or is weather-driven.
- Test fixtures one at a time. Run each sink, shower, and toilet individually, then check the wall behind and below it for new dampness. Drain leaks only show up while water is flowing, so a wall that reads dry at noon can read wet at night.
- Check the water heater and appliance connections. Supply hoses behind washing machines and the T&P valve discharge on water heaters are two of the most common slow-leak sources. Look for corrosion, mineral crust, or a damp ring on the floor.
- Inspect the attic and roofline after heavy rain. Look for staining on rafters and sheathing, especially around flashing, vents, and chimney penetrations. Roof leaks often travel down framing before they show up on a ceiling, so the stain is rarely directly below the entry point.
- Test the wall surface with a paper towel and your hand. Press a dry paper towel against the suspected area. Coolness or transfer of moisture is a strong indicator. Compare the same spot on an interior wall that shares the same plumbing run.
- Look at baseboards and trim. Swelling, separation, or soft wood at the bottom of a wall points to water pooling inside. Baseboards act like a wick, if the bottom edge is soft and the top is firm, water is coming from below or behind.
- Trace the pattern. Water travels down and sideways along framing, so the stain is often not directly below the leak. A stain on the ceiling near an exterior wall usually means the entry point is uphill and outboard of where you see it.
Water Leak Detection Tools Every Homeowner Should Know
The right water leak detection tools turn guesswork into a diagnosis. A handheld moisture meter costs little and gives you a numeric reading of dampness inside drywall, wood, and concrete. Pin-type meters measure at the surface; pinless meters scan deeper without leaving holes.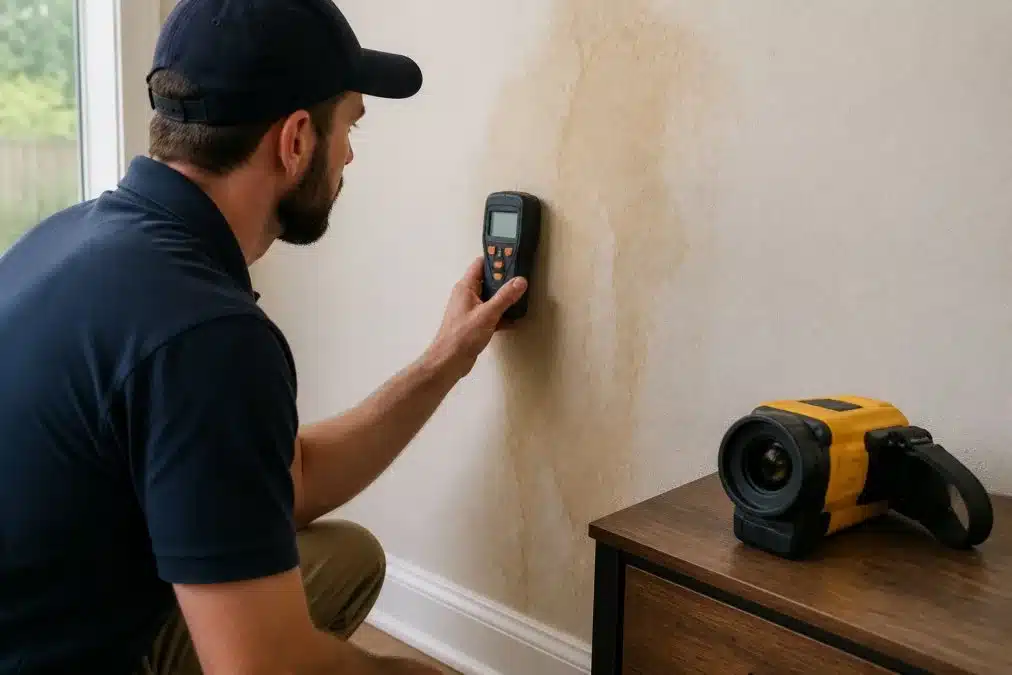
| Tool | What It Detects | Best For | Skill Level |
|---|---|---|---|
| Pin moisture meter | Surface and shallow dampness | Confirming a suspected spot | Beginner |
| Pinless moisture meter | Dampness behind drywall | Scanning without damage | Beginner |
| Thermal imaging camera | Temperature anomalies from moisture | Locating the source area | Intermediate |
| Humidity meter | Ambient humidity levels | Tracking condensation risk | Beginner |
Does Homeowners Insurance Cover Burst Pipes and Hidden Water Damage?
Whether homeowners insurance covers burst pipes and hidden water damage depends on the cause, not the damage itself. Most standard policies cover sudden and accidental discharge, like a pipe that bursts overnight. They typically exclude gradual seepage that built up over months, because insurers treat that as a maintenance issue. The National Association of Insurance Commissioners homeowner resources advises homeowners to document damage thoroughly and report claims promptly. In practice, this means photographing everything before cleanup, keeping receipts, and being honest about when you first noticed the signs. A claim denied for “gradual damage” is usually a claim where the timeline was unclear. What typically gets covered:- Sudden pipe bursts and appliance supply-line failures
- Storm-driven water intrusion through a damaged roof
- Resulting damage to floors, ceilings, and personal property Persistent moisture often originates from compromised exterior layers, making a thorough roof damage inspection essential for identifying the subtle entry points that lead to these interior structural failures.
- Long-term seepage the homeowner should have noticed
- Poor maintenance or neglected plumbing
How Wall Materials Change the Warning Signs
Wall materials fail differently, and knowing yours tells you what to look for, and how long the damage may have been hiding. The underlying cause is the same moisture intrusion, but the surface tells a different story, and a homeowner with plaster walls may miss early cues that are obvious on drywall. Drywall (gypsum board). The paper facing separates from the gypsum core when saturated, which is why bubbling, blistering, and a soft, spongy feel are the first cues. Drywall also wicks water laterally, so a small leak can stain a wide area. A pin-type moisture meter reads drywall reliably at the surface; a pinless meter reads deeper without leaving holes. Drywall hides damage poorly, it telegraphs moisture within days. Plaster (lath and plaster, common in pre-1950 homes). Plaster is denser and slower to show moisture, so damage can accumulate for weeks before a visible sign appears. Watch for hairline cracks that spiderweb outward, a chalky or powdery surface, and paint that flakes rather than bubbles. Plaster also holds moisture longer than drywall, which means a meter reading can stay elevated after the source is fixed. Pinless meters tend to read plaster more consistently than pin-type meters, which can struggle with the hard surface. Brick and masonry. Brick and mortar push moisture outward, which is where efflorescence, the white, chalky mineral deposits, appears as water evaporates through the surface. Spalling (flaking or crumbling brick faces) and a white haze that returns after you brush it away both point to ongoing moisture. Masonry leaks are often at the mortar joints, not the brick itself. Moisture meters for masonry require a dedicated setting or a meter rated for the material; a drywall meter will read misleadingly low. Wood paneling and wood framing. Wood absorbs water and eventually rots, and by the time you see decay, the damage is often advanced. Look for darkening, a raised grain, soft spots around nail heads, and paneling that has pulled away from the wall. Wood also swells, so doors and windows in the same wall may begin to stick. A pin-type meter pushed gently into the wood gives the most reliable reading; pinless meters can be fooled by the finish. Tile and backer board. Grout lines darken and crack, tiles lift or sound hollow when tapped, and the backer board behind them can crumble without any visible sign on the tile face. This is one of the slowest materials to reveal a leak, which is why a meter reading at the base of a tiled wall is worth taking even when the surface looks fine. What this means for you. The material determines how long damage can hide and which tool reads it accurately. Drywall tells you fast; plaster, masonry, and tile can hide a leak for weeks. If you know what your walls are made of, you know how aggressively to test, and how much weight to put on a single reading.Preventative Maintenance Checklist to Stop Water Damage in Walls
Stopping water damage in walls is mostly about catching small problems before they become hidden ones. Run this checklist seasonally:- Inspect supply lines under every sink for corrosion or dampness
- Check the water heater and washing machine hoses for cracking
- Clear gutters and confirm downspouts direct water away from the foundation
- Look for roof leaks after heavy rain, especially around flashing and vents
- Test the sump pump before storm season
- Watch indoor humidity levels and run ventilation in bathrooms and kitchens
- Re-check any wall you’ve previously repaired for returning stains
When to Call a Professional for Water Damage in Walls
Call a professional when you’ve confirmed moisture but can’t find the source, when the affected area spans more than a small section of wall, or when you smell musty odor that won’t clear. Water that has reached insulation, framing, or the subfloor needs commercial drying equipment to prevent secondary damage. Mr. Restore is an IICRC-certified restoration team with a 60-minute arrival guarantee and 24/7 emergency response. We use moisture meters and thermal imaging to map exactly where water has traveled, work directly with your insurance company to simplify the claim, and keep you updated in real time through our Job-Dox system. If you’re worried about how fast damage spreads, waiting a day rarely saves money. It usually costs more.Hidden water damage in walls rewards homeowners who look closely and act early, and it punishes those who wait for the ceiling to sag. If you’ve spotted the signs and want a definitive answer, Mr. Restore can confirm the source, document the damage for your claim, and dry it out properly the first time. We offer direct insurance billing, IICRC-certified technicians, and real-time project updates from arrival to completion. Get started with Mr. Restore and stop a small leak before it becomes a structural repair.
Frequently Asked Questions
What are the early signs of water damage in walls?
Look for discoloration, water rings, bubbling or peeling paint, warped drywall, and a musty odor. Baseboards may feel spongy, and flooring near walls can cup or buckle. Doors and windows may begin to stick. Catching these signs of hidden water damage in walls early prevents decay and expensive structural repairs.
Does homeowners insurance cover burst pipes and hidden water damage?
Most standard policies cover sudden and accidental burst pipe damage, including water mitigation and repair. However, gradual seepage or long-term neglect is typically excluded. Document everything with photos, keep receipts, and contact a restoration company that works directly with insurers to help streamline your claim.
How long does it take to dry out walls after water damage?
Professional drying typically takes three to five days, depending on wall material, humidity levels, and how much water was absorbed. Drywall saturation and insulation damage can extend that timeline. Restoration technicians use moisture meters and thermal imaging to confirm walls are fully dry before closing the job.
What should I do if I suspect hidden water damage in my walls?
Shut off the water supply if a leak is active, then check for visible signs like water stains, warped drywall, or musty odor. Use a moisture meter to confirm dampness, and call a certified restoration company for a professional assessment. Quick action limits secondary damage and protects your home’s structural integrity.